
Cosplay Tutorial: Building Gaige's Robo Arm on a Budget!

Gaige's Robo Arm Tutorial...Boop!
This may not be the absolute best or most impressive way to approach Gaige's robotic arm, but it doesn't cost a ton and is manageable for nearly any skill level. It's flexible, looks legit, and is perfect for high-fiving!
Get some stuff:
Optional (for easier pattern making):
- plastic wrap
- painters or masking tape
- sharpie
Not so optional:
- paper (for pattern making if not using above materials)
- black opera length glove (22" and up - bought mine from amazon.com)
- 2mm craft foam (thinner stuff - buy at local craft store - Michael's, Hobby Lobby, etc.)
- scissors
- pen
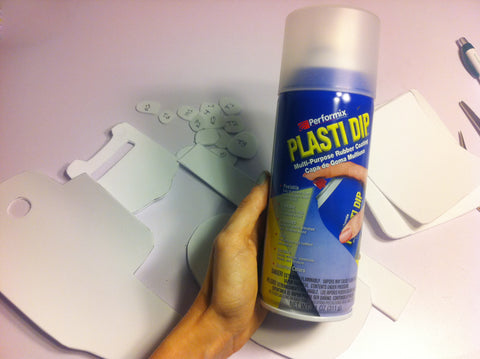
- plasti dip (I use clear - buy at local hardware store - Lowes, etc.)
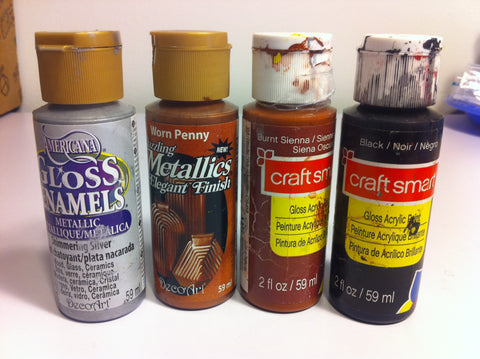
- acrylic paints (silver, black, brown, etc.)
- paintbrushes
- hot glue
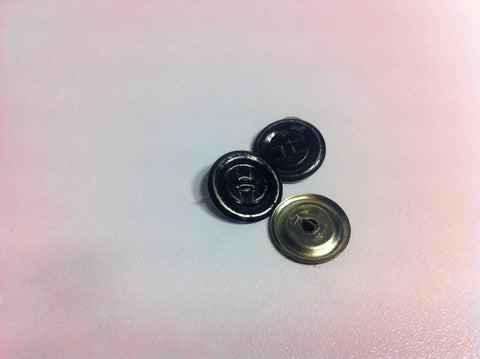
- metal brads or some type of small disk like thingy ma bobber (used for in between armor on hand)
- heat source (I used stove burner...this was before I owned a cheapo heat gun)
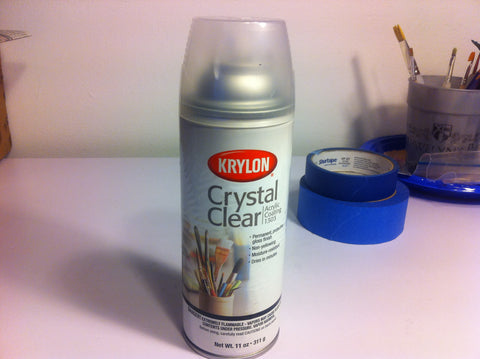
- crystal clear
Put some stuff together and make things:
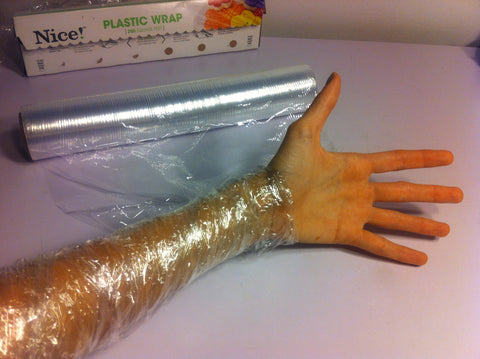
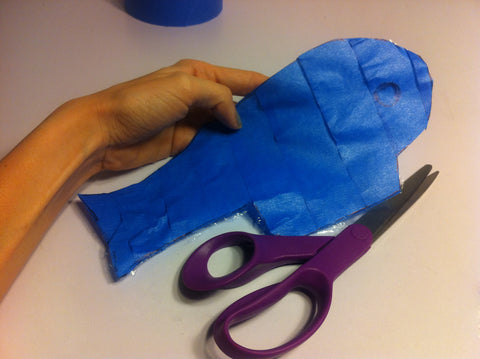
- Wrap your left appendage in plastic wrap. Don't leave gaps, hair + tape = bad mojo.
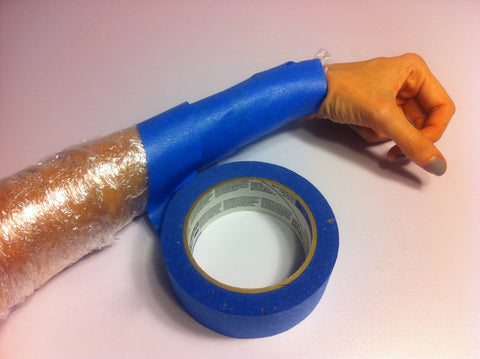
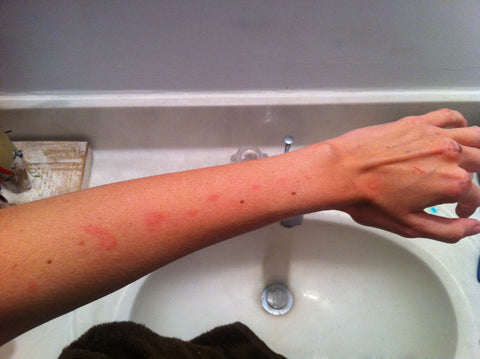
- Now cover that in tape. Fairly snug, but keep in mind that scissors will need to sneak under both the plastic wrap and tape. If you actually cut your arm off, this tutorial probably won't deliver the same results.
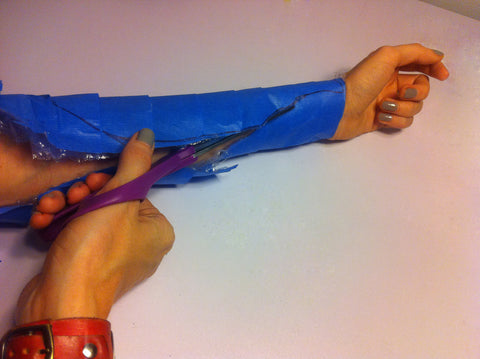
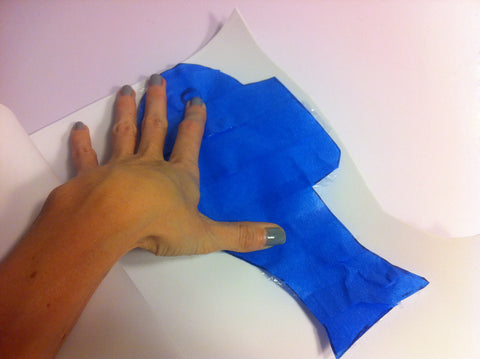
- Draw your pattern directly onto the tape using a sharpie. I had Gaige pulled up on my screen in-game, so I could rotate her and reference the shapes from every angle. (Plus, she's super cute and I like to look at her.) I used the plastic wrap and tape method for the main pieces of her arm to get accurate sizing and placement. For the other pattern pieces, like her hand/fingers, I just sketched these directly onto paper, and created my pattern that way.

- Cut off your arm...your arm cast! Carefully now! Make sure you are getting beneath all layers of the plastic wrap for a nice, clean cut. Continue cutting along your lines to produce your pattern pieces.
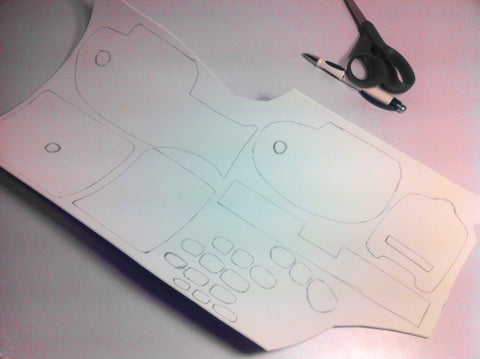
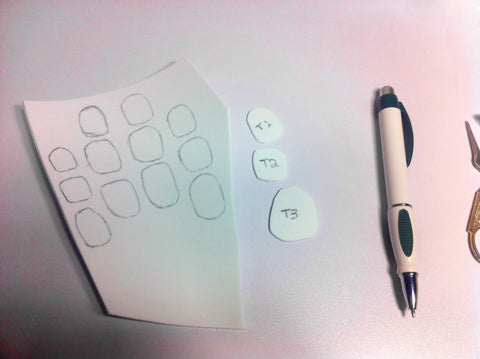
- Grab your craft foam and trace all of your pattern pieces onto it. I normally use a regular ballpoint pen to do this. The second image shows all of the pieces that I created and used for my own robo arm.
- Cut 'em all out! All of them! You might want to label the back of the pieces for your fingers to keep yourself from getting them mixed up later.
- Seal your craft foam in preparation for painting. Craft foam eats paint if not properly fed beforehand. Feed it some Plasti Dip (some may say to shape it first, but the Plasti Dip will flatten it back out anyways). I spray only the right side up (underside won't show or matter here) of my craft foam. This will take several layers (at the very least...three). Allow plenty of time to dry in between.
*Note: Plasti Dip has some fierce fumes...I would recommend a mask and spraying in an area with good ventilation.
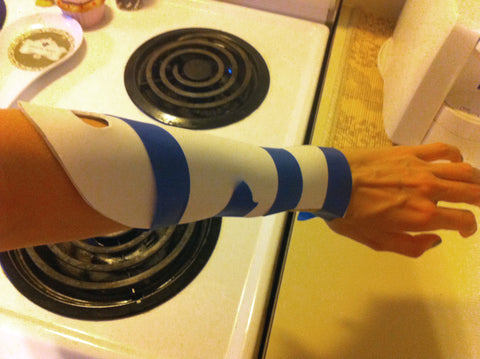
- Once you have properly sealed your foam, it is time to give it some curves. A heat gun works well if you have one, if not, you can carefully heat your pieces over a stove burner. I normally set mine on a medium to high setting. It doesn't take long, hold your foam over the heat for roughly 5 seconds. You will feel it get a little floppy and loose. Remove it from the heat and immediately press it to your form and hold in place for 10-15 seconds until it cools. For larger pieces, like the main forearm piece, I taped it in place for easier molding (as pictured).
*Note: I sometimes cheat and pop my smaller pieces directly into the freezer after molding them to shape. It only takes a few seconds for them to cool and they seem to hold their shape like Kablam!

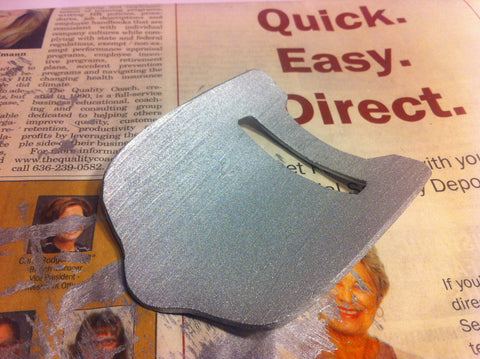
- Paint! Paint! Paint! Firstly, I painted the underside of all of my pieces with a thin coat of silver paint. No, we didn't seal this side so it will look icky, but it'll give it a touch of color just in case a sliver of it would show for any reason (you can see how porous and grainy it dries in the first photo). Once that completely dries, give the correct side of all of your foam pieces a nice coat of silver paint as a base (if sealed properly, this should dry much smoother). From there, I used the acrylic paints shown to weather and finish off my paint job. (I also snipped the back off of fifteen metal brads and painted them black.)
- Seal! Seal! Seal! I gave all of my painted armor pieces a thin coat of crystal clear, as well as the metal brads. Don't go too thick to allow for flexibility.
*Note: There are extra steps and materials needed to achieve super shiny armor, but Gaige's robo arm isn't a sparkling, new piece of machinery, now is it?!?!!
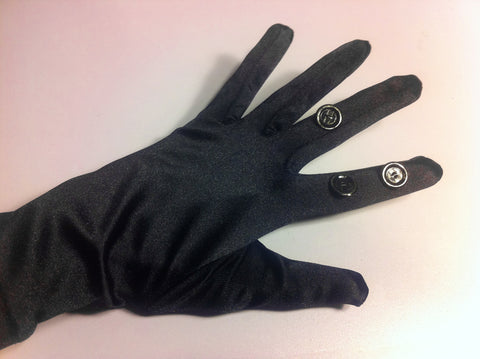
- Now for my favorite part! Glue all the things together! Engineering at its finest! Start by hot gluing all of the metals brads (or whatever you've chosen to use here). You have put on the black glove, right? I sure hope so. I mostly placed my metal brads along the knuckles, so they'll peek through the individual finger armor pieces. I glued down all of the hand pieces first and worked my way up the arm.
*Note: Hot glue is hot. You might consider wrapping your arm in aluminum foil if you can still pull your glove on over it. I sustained minor injuries. Gaige cut her own arm off...I figured I was merely getting into character.
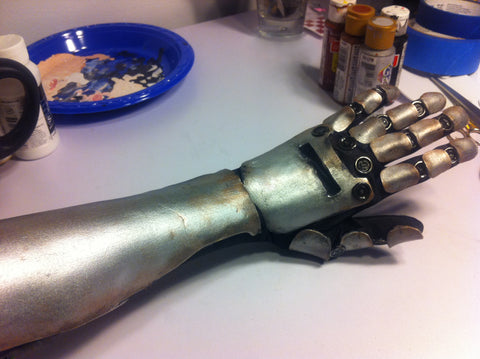

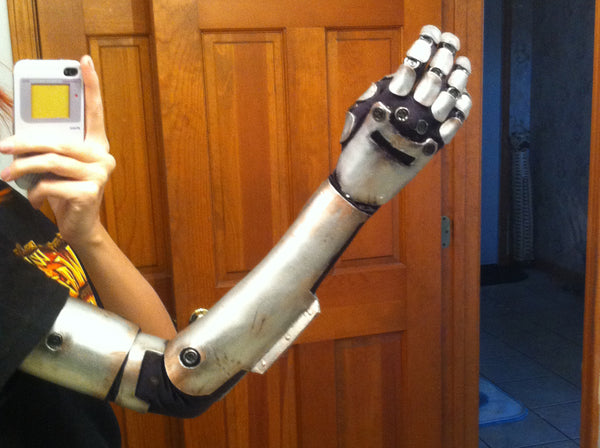
...BEHOLD!!!!!! YOU NOW HAVE YOUR VERY OWN BIONIC ARM OF BADASSERY!!!!
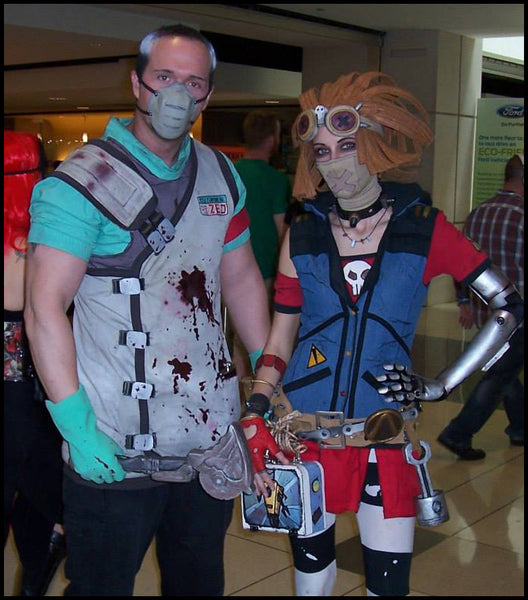
Photo by Unknown. Will the real sly photog please stand up? Please stand up.
*FINAL NOTE: If your arm does not summon Deathtrap, revert back to step #1.

